A serendipitous discovery of a large leaf in a mountain stream, led me to try molding it with a concrete mix. It was loads of fun creating a lovely molded leaf to save as a garden art piece
Recently I happened to go on a drive up to the high country on an errand. It’s a great place for an errand, so I packed a dinner picnic and we packed up the dog and headed up towards Whiskey falls, a spot in the mountains near our home.
After Tractor Man, now ‘Motorcycle Man’, had finished getting the correct mileage for a section of the dualsport ride he was planning, we were all set for dinner.
Sitting in front of the Falls about to bite my dinner, I happened to see that the large leafed plants called Indian Rhubarb were at their peak and filling the stream banks below the falls.
That is how it came that there were two huge leaves sitting in water bottles on my kitchen counter.
We had Whiskey Falls to ourselves in early July. This is how close you are while munching on a panini!
Next morning, I cast the leaf with cement mix!
Leaf, Rhubarb, elephant ear or any large leaf
Sand
Portland cement
dry cleaning bag
kitchen trash bag
The recipe I used was 2 quart scoops of Portland cement and 6 quart scoops sand for two leaves. I mixed the ‘batter’ as thick as Brownie batter.
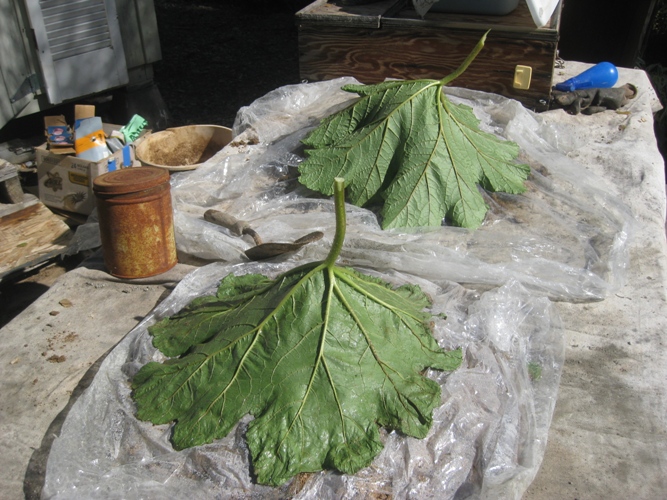
I lay a kitchen trash bag on the table, then the mound of sand. I poured sand on the table surface about 5 inches high and placed the first leaf one arranging the leaves around.
I placed one layer of the dry cleaning bag over the sand, BEFORE putting the leaf down. That kept the sand away from the cement.
Covering the leaf with the ‘batter’
I sprayed the leaves with Pam and carefully covered the leaf with a half inch of the cement mix, thicker in the middle and a good half inch at the edges for my first try. I patted the surface which made it nice and smooth.
Plastic allows the concrete to dry slowly, preventing cracks
I covered the entire project with a kitchen trash bag finished about 10:30 or 11am so I needed to wait 24 hours to ‘unmold them.
Now, just wait 24 hours!
About 23 hours later (Yes, I was excited!):
I carefully reached under through the sand hill and lifted up the leaf casting, with the leaf still attached. I was amazed how well the leaf itself still looked, still green but looking a bit ‘cooked’
Since I had sprayed the leaves with Pam so it came off pretty well, an astounding process, REALLY FUN!!
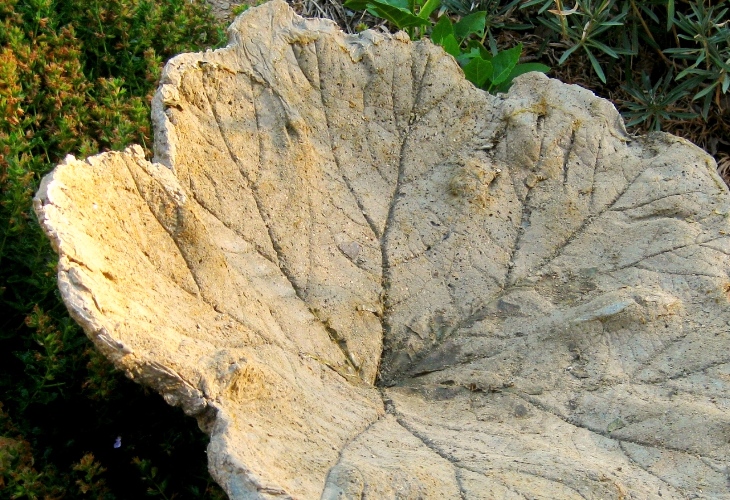
Every detail shows,….how nice!
See the mound of sand that the leaf was placed on before the cement was put on?
This is how thin the casting turned out. Without using a bonding agent or strengthening fibers, this thickness seemed very stable, not too fragile, although, believe me I was VERY careful.
See the ridges and design? You can see how the cement ran past the leaf edges at the top. I need to figure out how to stop that.
All finished except for paint and some kind of mounting to hold it above the ground just a bit.. A grouping of these might look nice. The instructions say use watered down paint for a ‘washed’ look.
I never painted the leaf casting but lifted it on a stump and set it in a bed of Germander (Teucrium chamaedrys) and Snow in Summer (Cerastium tomentosum). A Bird’s Nest spruce (Picea abies ‘Nidiformis’) is on the left.
With a bit of the extra cement mix, I molded up a tiny mushroom.
***
Darmera peltata is the only plant in its genus and some say the largest saxifrage in the world. A perennial grown from a rhizome, it’s found along streams in Northern California and southern Oregon. It’s native to California. It needs its feet in water and can be found at Annie’s Annuals, I was surprised to see. Pete from east bay wilds has had it in his flickr photostream as well. It has stunning fall color and in the winter droops down along Whiskey Falls looking very dejected, as shown in the photo below at the top of the falls.
Maybe it would grow in our ravine where the water comes down as a trickle, even in summer.
See links below…
...and still have a pretty garden With a busy household and jobs, we are…
Take a day trip to Whiskey Falls... Come visit Whiskey Falls and the surrounding high…
Why do oaks drop more acorns some years and not others? If you have live…
Roadside treasures worth stopping for In the first week of July in the Sierra foothills…
Wow! Butterflies love these plants! Grow any of these for instant results and each is…
Your water-wise veggie garden Does everyone in our Mountain Community grow at least one tomato?…