Finished but still drying
Hypertufa (pronounced hyper-toofa) is a mixture of peat moss, perlite, cement and water.
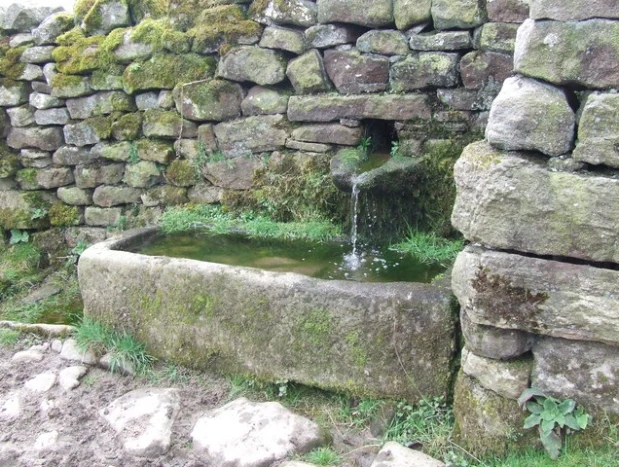
Old stone watering troughs in England could be found in farmer’s fields, sometimes built into stone walls to provide water for two fields of livestock.
These troughs are usually one-of-a-kind, and very rare and desirable to alpine gardeners and plant collectors and are very expensive and heavy, as well. Now you can make them yourself.
There is a natural volcanic rock called tufa, which has also been used by gardeners. There are a few natural deposits found around the world, some in Britain, some in North America and various other areas. In the 1800’s, English gardeners found that by mixing certain ingredients they could make a light weight version of stone troughs. In time, hypertufa will develop the look of weathered stone.
For those who like miniature plants which often get lost in a garden, making your own troughs, and really, any shaped stone-like container, is easy and fun! I like growing succulents and other small plants and after hearing about hypertufa long, long ago, have always wanted to try it.
So,… this past month my friend Cheryl and I decided to give ourselves an assignment: to give a workshop to our garden club! O…K…!
Cheryl measures out dry ingredients in a galvanized container. Mix cement, peat & perlite before adding the water.
We used a 1 quart measure. 4 scoops of each, cement, peat moss and perlite. That made two small troughs. We made two batches and four troughs in three hours. The first hour was running around finding equipment and setting up.
Finding the Materials
It was a bit daunting just to buy the materials. The peat moss was easy, available in big bales at our local hardware store. the Portland cement, only available in 93 lb bags at the lumber store was never touched by me until Tractor Man hefted it down the steps to our old picnic table work area. the big bag of perlite was only available at a big box store and was picked up next time we went to tot he valley. everything else we scrambled for the day before our project.
The mix is not sticky and it’s easy to clean up. Surprised me!
We prepared the molds, plastic containers, or corrugated boxes, lining each with a dry cleaning bag. Add water to the mix a little at a time until it feels like mudpies, or Brownie batter and holds together in a ball when you squeeze it.
Supplies
The sides are 1 1/2” thick. While we did this one, we had two other molds ready and waiting.
Press firmly and don’t jostle the box or the trough will crumble. DON’T use shoe boxes like we did with this one. The corrugated shown above is better. We wrapped the shoebox with duct tape and it still wobbled out of shape. The bottom will be square and the top round, but Cheryl said she liked it that way.
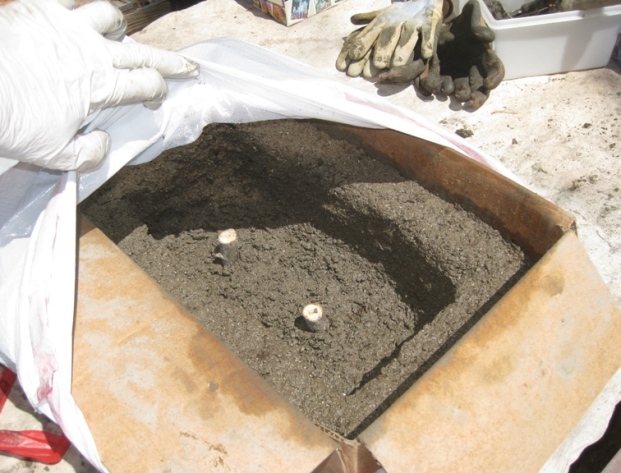
Carefully lift box or container into a plastic trash bag, mist with water and seal loosely. For one day leave the trough in the bag and mist a couple times so it dries slowly. Do not move or they will crumble.
IMPORTANT: The next day, take out the sticks used to make drain holes. It’s much harder to do so afterward.
After a week, I cut away the box molds and carefully let them dry further without the plastic bags.
Recipe
Five Steps
Day Two- Unmolding, second batch and planting Two weeks later…
This day, we planned to unmold the troughs we made, make another batch with a slightly different mix and plant some as examples to show at our demonstration in two days.
We had used dry cleaning bags to line the plastic containers, so when unmolding, just gathered up the corners and lifted the trough right out. They were fragile.
We carefully soaked the troughs in a wheelbarrow full of water for three days before planting to leach out the lime from the cement. Guess plants don’t like too much lime. Note…we skipped this step for any other troughs. You can do it, or not,…we planted our unsoaked troughs and they do fine.
Then came the fun part,…planting. While planting we moved the troughs by sliding them on the cardboard. We decided to use succulents, but think miniature bulbs would look great in these!
Thanks for viewing our fun experience! Tomorrow I’ll post about our demonstration.
...and still have a pretty garden With a busy household and jobs, we are…
Take a day trip to Whiskey Falls... Come visit Whiskey Falls and the surrounding high…
Why do oaks drop more acorns some years and not others? If you have live…
Roadside treasures worth stopping for In the first week of July in the Sierra foothills…
Wow! Butterflies love these plants! Grow any of these for instant results and each is…
Your water-wise veggie garden Does everyone in our Mountain Community grow at least one tomato?…